
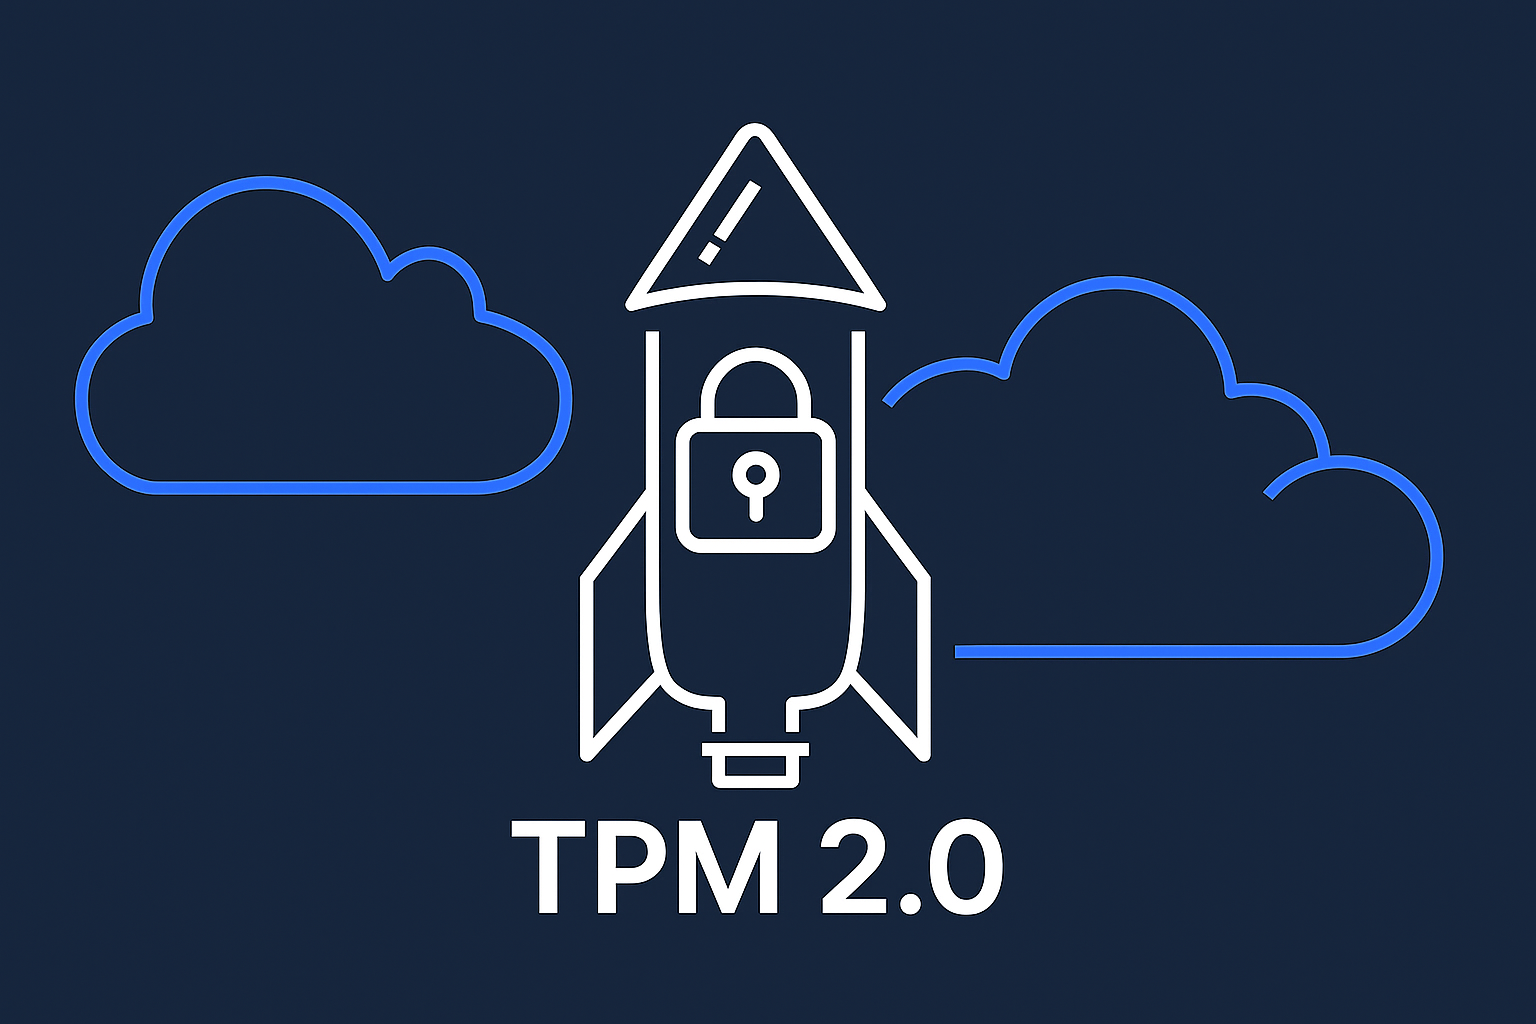
Part 2 of 4: How we contributed TPM support to Bottlerocket to bind encrypted data to specific hardware
In Part 1, we explored how Bottlerocket uses UEFI Secure Boot and dm-verity to create a cryptographically verified boot chain. This gives us confidence that the operating system hasn't been tampered with. But what happens when you need servers to boot automatically after power failures, while still ensuring customer data can't be accessed if a disk is removed?
This is where Trusted Platform Module (TPM) technology becomes fascinating. At Molnett, we contributed TPM support to Bottlerocket upstream to solve exactly this challenge. Today let's explore TPMs, how they work, what you can do with them and why we chose a very strange PCR to bind our LUKS encryption keys to.
The Operational Challenge
"Uptime is the greatest enemy of security" a friend told me recently. Hilarious as it is, it is also fundamentally true. Usually when you need to make things secure, you make it harder to ensure they are also available at all times. A great example of this is a common hygiene factor of disk encryption.
(A very understandable hygiene factor with plenty of public examples on why, for instance, in 2022, Morgan Stanley was fined $35 million after unencrypted hard drives containing data from 15 million customer accounts appeared on eBay. The drives came from decommissioned data centre equipment that hadn't been properly sanitised.)
Traditional approaches to disk encryption on hardware force you to make a choice on a sliding scale with Uptime and Security on opposite ends:
- Store encryption keys on the disk itself, great uptime, poor security
- Require network connectivity to a key management service, better security, worse uptime as you now have a bunch more failure modes
- Have someone manually enter passwords, great security but terrible uptime as now a poor soul needs to actually access the server before it can start working again
TPMs however offer a great fourth option: keys that only the original hardware can access, allowing you to at least bind the encryption to the server itself. This means that as long as you don't lose the TPM module and server with the disks (very unlikely in the Morgan Stanley recycling scenario), the customer data remains safe. Let's learn what a TPM is and how it works!
What are TPM and Platform Configuration Registers?
A Trusted Platform Module (TPM) is a specialised chip that acts as a hardware security anchor. Think of it as a tiny, highly secure computer within your computer that can:
- Generate and store cryptographic keys that never leave the chip
- Measure and record what happens during boot
- Seal secrets that can only be unsealed under specific conditions
- Prove to remote systems what software is running
We will go through in plenty of detail how they work, but if you have a few weeks more, you can also read the TCG TPM 2.0 Library Specification!
Platform Configuration Registers: The TPM's Memory
At the heart of TPM's measurement capabilities are Platform Configuration Registers (PCRs). These are special memory locations that record cryptographic measurements of boot events. A TPM 2.0 chip provides 24 PCRs, each serving a specific purpose as defined by the TCG PC Client Platform Firmware Profile.
Key behaviour: PCRs are reset to zero on each boot (cold boot, reboot, or TPM reset) and then extended with measurements as the system boots. This ensures that each boot cycle starts with clean PCR values and builds up a fresh measurement chain.
The magic of PCRs lies in how they're updated. When your system boots, each component measures the next before executing it, creating an unbreakable chain of trust. Here's how it actually works:
The Measurement Process:
- Software computes the hash - The currently running component (firmware, bootloader, kernel) computes a SHA-256 hash of the next component to execute
- TPM extends the PCR - The software sends a
TPM2_PCR_Extendcommand with the pre-computed hash to the TPM chip - TPM performs the extension - The TPM internally computes:
PCR[n] = SHA256(PCR[n] || incoming_hash)
This creates an append-only log where you can't erase previous measurements, the same events in different order produce different results, you can't determine what was measured just from the final value, and any change in boot process results in different PCR values.
Who Measures What:
- UEFI firmware measures bootloader components one by one into PCR 4
- Shim bootloader measures GRUB into PCR 9, MOK state into PCR 14
- GRUB measures kernel/initrd into PCR 9, command line into PCR 8
- Linux kernel (if IMA enabled) measures files into PCR 10
- systemd measures boot phases into PCR 11
For detailed specifications, see the TCG PC Client Platform Firmware Profile and Linux TPM PCR Registry.
The Complete PCR Landscape
Each PCR has a specific purpose. Here is a graphic of all the 24 PCRs:
For detailed explanations of systemd's PCR usage, see their TPM2 PCR Measurements documentation.
PCR Details That Matter
PCRs 0-3: The Hardware Foundation
PCR 0 is your hardware's fingerprint. Every time the system powers on, the firmware measures itself before doing anything else. This creates a unique identifier for your specific BIOS/UEFI version. Change the firmware? PCR 0 changes accordingly.
PCR 1 captures how your firmware is configured - all those BIOS settings like virtualisation enabled, boot order, performance profiles. Even changing a single BIOS setting alters PCR 1.
PCRs 4-7: The Boot Transition
PCR 4 measures your boot manager - typically GRUB or systemd-boot. This PCR is reset on each boot and then extended with measurements of the bootloader code that successfully executes.
PCR 7 is the Secure Boot register. It contains:
- Whether Secure Boot is enabled (all zeros if disabled)
- Platform Key (PK) - the root of Secure Boot trust
- Key Exchange Keys (KEK) - keys that can update db/dbx
- Signature database (db) - authorised signing certificates
- Forbidden signatures (dbx) - revoked certificates
For more on Secure Boot and PCR 7, see Matthew Garrett's excellent post on Secure Boot policy and signing.
PCRs 8-15: The OS Domain
PCR 11 is where systemd shines. It measures boot phases:
"enter-initrd" → "leave-initrd" → "sysinit" → "ready" → "shutdown" → "final"
You can examine current PCR values on a running system:
$ tpm2_pcrread sha256:0,1,4,7,8,9,11,14

sha256:
  0 : 0x7F4A8E9F3B2C4D5E6A7B8C9D0E1F2A3B4C5D6E7F8A9B0C1D2E3F4A5B6C7D8E9F
  1 : 0x3B2C4D5E6A7B8C9D0E1F2A3B4C5D6E7F8A9B0C1D2E3F4A5B6C7D8E9F0A1B2C3D
  4 : 0xAB3D7E2F94C8B1A6D5E0F3248796CBEA12D5A8F3B6C9E2D7A4F10B3E8C5D9A7F
  7 : 0x0000000000000000000000000000000000000000000000000000000000000000
  8 : 0x9E7D6C5B4A3F2E1D0C9B8A7F6E5D4C3B2A1F0E9D8C7B6A5F4E3D2C1B0A9F8E7D
  9 : 0x5D4C3B2A1F0E9D8C7B6A5F4E3D2C1B0A9F8E7D6C5B4A3F2E1D0C9B8A7F6E5D4C
 11 : 0x8A7F6E5D4C3B2A1F0E9D8C7B6A5F4E3D2C1B0A9F8E7D6C5B4A3F2E1D0C9B8A7F
 14 : 0x0000000000000000000000000000000000000000000000000000000000000000
Notice PCRs 7 and 14 are all zeros? That indicates Secure Boot isn't enabled and no MOK enrolled - more on that later.
Measured Boot vs Secure Boot: Different Tools for Different Jobs
It's important to understand that Secure Boot and Measured Boot serve different purposes:
Secure Boot is a preventive control enforced by firmware. It verifies signatures before allowing code to execute. If verification fails, boot halts immediately.
Measured Boot is about creating a cryptographic record of the boot process. It records what executed into PCRs, creating verifiable "goal posts" that represent known good system states. The TPM doesn't enforce anything during boot - it just provides trustworthy measurements.
The Power of Goal Posts: Here's where measured boot becomes genuinely powerful. These PCR measurements act as cryptographic goal posts that you can use to:
- Seal secrets locally that can only be unsealed when the system reaches exactly the same state
- Enable remote attestation where the server submits its current PCR values to a remote system, which decides whether to share secrets based on those measurements
This distinction is crucial: measured boot creates the goal posts, while sealing policies (local) and attestation services (remote) enforce access based on those goal posts. You can think of PCRs as immutable ledgers that record "this is what actually happened during boot" - then systems (local TPM or remote attestation service) can decide "I'll only provide secrets if this specific thing happened."
Our TPM Contributions to Bottlerocket
When we started building Molnett, we needed servers that could boot autonomously while keeping customer data secure. Bottlerocket had no TPM support at all, so we contributed initial TPM capabilities upstream through PR #327 and PR #518.
Our contributions enabled:
- TPM 2.0 device detection and initialisation
- Integration with systemd's TPM subsystem
- Foundation for measured boot and attestation
With these building blocks in place, we could implement hardware-bound disk encryption.
TPM Sealing: The Key to Automatic Unlocking
TPM sealing is what makes automatic disk unlocking possible whilst still providing meaningful security. When you seal data to a TPM, you're creating a dual cryptographic binding that enforces two conditions simultaneously:
- Hardware Binding: The data can only be decrypted by this specific TPM chip
- State Binding: The PCR values must match what you specify
This dual binding is achieved through the TPM's internal key hierarchy and unique hardware seeds that never leave the chip.
How Sealing Actually Works
The sealing process is simpler than it might appear:
The beauty is that this happens automatically. No passwords, no network calls - just cryptographic proof that you're on the right hardware in the right state.
The Deep End: Cryptographic Implementation Details
For those who want to understand the cryptographic mechanics, here's how the pieces work together: (otherwise skip ahead to the Implementation section)
Now let's break down each component:
Hardware Seed (Red)
This unique value (typically 256 bits) is burned into each TPM during manufacturing and serves as the cryptographic root of trust. It never leaves the TPM's secure boundary.
Key Derivation Function (KDF)
A Key Derivation Function takes input material (the hardware seed + template) and produces cryptographic keys in a deterministic way:
Storage Primary Key = KDF(storage_seed, template)
The beauty of KDFs is that they're deterministic (same input = same output) but produce completely different outputs for different inputs. Change one bit in the storage seed, and you get a completely different key. This is what makes hardware binding mathematically guaranteed.
Template
The template defines the key's properties - algorithm, key size, usage attributes, and authorization policies. It ensures that the same seed produces the same key when combined with the same template.
Storage Primary Key
This is the cryptographic key derived from the hardware seed. It's used to encrypt/decrypt sealed objects and can only be recreated on the same TPM chip with the same template.
Current PCR Values (Green)
These are the measured boot values we discussed earlier - cryptographic hashes representing the current system state. For our use case, this is PCR 0 (firmware measurements) for now.
Command Code
The command code is a constant that identifies which TPM operation created the policy. For PCR-based policies, this is TPM2_PolicyPCR. This prevents policy confusion attacks where one type of policy could be substituted for another.
Policy Parameters
Policy parameters specify exactly which PCRs are being used and how. For example, "PCR 0 with SHA-256 bank." This ensures the policy is specific to the exact PCR configuration.
Policy Digest
The policy digest is a cryptographic hash that commits to the exact conditions for unsealing:
policy_digest = SHA256(PCR_values + TPM2_PolicyPCR + policy_parameters)
This digest is computed at sealing time and embedded in the sealed object. During unsealing, the TPM recomputes this digest with current conditions and compares. If they don't match exactly, unsealing fails.
Sealed Object Policy
This is the authorization policy embedded in the sealed object. It cryptographically binds the sealed data to specific system conditions.
Encrypt Secret
The final step combines both the hardware-derived key and the state-derived policy to encrypt the secret. Here's how the TPM actually does this:
# 1. Create object name incorporating policy digest
objectName = SHA256(publicArea.type || publicArea.authPolicy || ...)

# 2. Derive encryption key from hardware seed + object name
encryptionKey = KDFa(nameAlg, parentSeed, "STORAGE", objectName, NULL, 128)
hmacKey = KDFa(nameAlg, parentSeed, "INTEGRITY", NULL, NULL, 256)

# 3. Encrypt the secret using AES-128-CFB
encryptedSecret = AES_CFB_Encrypt(encryptionKey, IV=0, userData)

# 4. Add integrity protection
integrityInner = HMAC_SHA256(hmacKey, userData)
integrityOuter = HMAC_SHA256(hmacKey, encryptedSecret || publicArea)

# 5. Final sealed blob
sealedBlob = integrityOuter || integrityInner || encryptedSecret
The policy digest becomes part of the object's identity (objectName), which directly affects the encryption key derivation. This means a different policy produces a different encryption key, making the sealed data cryptographically bound to the exact policy conditions.
Sealed Blob (Blue)
The final sealed blob contains the encrypted secret, dual HMAC integrity protection, and the policy requirements embedded in the object's name. It can only be decrypted by the original TPM when the system is in the authorized state, since both the hardware seed and policy digest are required to derive the correct encryption key.
What a Real Sealed Blob Looks Like
In practice, the sealed blob is stored as a JSON token in the LUKS2 header. You can inspect it using:
cryptsetup token export /dev/nvme0n1p2 --token-id 0
This outputs a JSON structure like this:
{
  "type": "systemd-tpm2",
  "keyslots": ["1"],
  "tpm2-blob": "AJ4AIAzziBYhzxeXTmvTWGSC4fuGyS2sWmmHn0s5FlCyQxytABBrpZ4Wi7Uvr6UHtYVb65BYCPHuBLHAcM/n0AzfSOe60M4BaOzX1/Zgfn1sEhZCxKPXODOYtNL7HNg9XzBuqE3wa1RAVRbgrSjxIDDIHH3JO46KEZpxHqG5e4f6BXczAT6TtGWiaTazmO4NcGo8hSQq088IolG3qNyROABOAAgACwAABBIAICVTUV0ncwa+WUGQxy+wXl/uiU4GcNoV10BcR23PbnvfABAAIAu8iZKpRhEQ+AUlnSM4+Mt/FzcSeRAoDxodN6qydKiI",
  "tpm2-pcrs": [0],
  "tpm2-pcr-bank": "sha256",
  "tpm2-policy-hash": "2553515d277306be594190c72fb05e5fee894e0670da15d7405c476dcf6e7bdf"
}
Let's break down what each field contains:
- type: "systemd-tpm2" - Identifies this as a systemd TPM2 token
- keyslots: ["1"] - Which LUKS keyslot this token unlocks
- tpm2-blob: Base64-encoded concatenation of TPM private and public key data
- tpm2-pcrs: [0] - Array of PCR indices used for binding (PCR 0 in our case)
- tpm2-pcr-bank: "sha256" - Which PCR bank algorithm was used
- tpm2-policy-hash: Hex-encoded policy digest that must match for unsealing
The tpm2-blob field contains the encrypted LUKS key, TPM key handles, metadata, and integrity protection data. During unsealing, the TPM decodes this blob, attempts decryption using hardware-derived keys, verifies PCR values match the policy hash, and returns the LUKS key only if both conditions are met. This cryptographic binding is why the same blob produces garbage on different hardware or system states.
Why This Creates Strong Security
- Hardware Binding: The Storage Primary Key is derived from a hardware-unique seed. No two TPMs can generate the same key, making hardware binding mathematically guaranteed.
- State Binding: The policy digest cryptographically commits to specific PCR values. Any change in system state produces a different digest, breaking the policy.
- Cryptographic Chaining: The sealed object is encrypted with keys derived from both the hardware seed AND the policy. Both must be correct for decryption to succeed.
- Integrity Protection: The sealed blob includes HMAC authentication, so tampering with the blob is detected immediately.
The Mathematical Foundation
The security relies on these cryptographic properties:
- KDF Security: Computationally infeasible to derive the storage seed from the primary key
- AES-GCM Security: Authenticated encryption provides both confidentiality and integrity
- SHA-256 Security: Policy digests are collision-resistant and tamper-evident
- Hardware Protection: Seeds are generated with true randomness and never exposed
This creates a system where breaking the protection would require either:
- Breaking the underlying cryptographic primitives (AES, SHA-256)
- Extracting the hardware seed from the TPM chip
- Finding a way to modify PCR values without changing the system state
All of these are considered computationally infeasible with current technology.
Implementing Hardware-Bound Encryption
With TPM support in place, we implemented automatic disk encryption for Bottlerocket - this is done as part of an automatic UDEV rule when finding disks without partitions:
# Format disk with LUKS2 encryption
cryptsetup luksFormat --type luks2 \
    --pbkdf argon2id \
    --pbkdf-memory 2097152 \
    --hash sha512 \
    /dev/nvme0n1p2

# Enroll TPM-sealed key
systemd-cryptenroll /dev/nvme0n1p2 \
    --tpm2-device=auto \
    --tpm2-pcrs=0
A separate UDEV rule maps these to specific well-known locations for encrypted ephemeral disks, which we can then use in our higher level systems without having to know any details of the encryption being applied.
How systemd-cryptenroll Works
The systemd-cryptenroll command generates a new random key for LUKS decryption, seals it with current PCR values using TPM2_Create, stores the sealed blob in the LUKS2 header's JSON token area, and establishes a PCR policy for unsealing.
The sealed key is stored as a LUKS2 token, which you can inspect:
# View all enrolled tokens
cryptsetup luksDump /dev/nvme0n1p2 | grep -A 10 "systemd-tpm2"

# Check TPM token specifically
cryptsetup token export --token-id 0 /dev/nvme0n1p2 | jq '.["tpm2-blob"]'
This integration means encrypted volumes unlock automatically when the right hardware boots in the right state, but remain locked in all other scenarios.
We chose to bind only to PCR 0 (firmware measurements). This might seem minimal, but it reflects careful consideration of our requirements and constraints.
PCR Selection: A Balancing Act
Choosing which PCRs to bind to involves trade-offs between security and operational flexibility:
PCR 0 provides hardware binding - different hardware has different firmware, so the disk can't be unlocked elsewhere. It changes only during firmware updates, which are rare and planned. This allows OS updates without touching disk encryption.
PCR 7 would add Secure Boot state validation, but we haven't actually enabled Secure Boot across our fleet yet (remember PCR 7 being all zeros?) as this is also significant work. By binding only to PCR 0 now, we preserve the option to enable Secure Boot later without having to re-enroll disk encryption on every server.
Once we enable Secure Boot with our own keys (not Microsoft's), we plan to migrate to PCR 7 binding. This would protect against certain reinstall attacks - an attacker couldn't simply install a different OS because PCR 7 would contain the hash of our specific Secure Boot configuration. However, it wouldn't prevent downgrade attacks since older versions signed with our keys would still be valid.
PCR 4 (bootloader) and PCR 9 (kernel) would prevent booting modified software, but would require re-enrollment with every update. For servers that need to boot autonomously, this creates operational challenges.
The trade-offs are relatively obvious (remember: uptime is the greatest enemy of security):
- More PCRs = stronger security but more operational complexity
- Fewer PCRs = easier operations but narrower security guarantees
Our current PCR 0-only approach provides the minimum viable protection we needed for our platform initially: disks can only be unlocked on their original hardware so we don't have to worry about clearing disks or destroying them safely if they are replaced by our hardware provider.
Future Enhancements: Signed PCR Policies
We're exploring more sophisticated approaches for the future. Instead of binding to raw PCR values (which require exact matches), we could use signed PCR policies that allow pre-approving multiple valid system states through cryptographic signatures.
How PCR Signing Policies Actually Work
Think of raw PCR binding as a single key for one specific lock, while signed policies are like a master key that works with any lock you've pre-authorised. Unlike raw PCR binding, signed policies introduce cryptographic delegation through a level of indirection.
The PolicyAuthorize Magic
PCR signing policies leverage the TPM 2.0 PolicyAuthorize command. Here's how it works:
Policy Creation: Instead of sealing directly to PCR values, you seal to a policy that includes:
PolicyAuthorize(PublicKey, PolicyRef)The Policy File: You create a JSON file listing acceptable PCR values:
{ "pcrs": { "0": ["7f4a8e9f...", "3b2c4d5e..."], // Multiple firmware versions "4": ["ab3d7e2f..."], // Current bootloader "7": ["bf3a8d2c..."], // Secure Boot state "9": ["9e7d6c5b...", "5d4c3b2a..."] // Multiple kernel versions }, "valid_until": "2025-12-31T23:59:59Z" }Signing: You sign this policy file with your private key:
openssl dgst -sha256 -sign policy-key.pem policy.json > policy.sigRuntime Verification: During unsealing, the TPM loads the policy and signature, verifies the signature using the embedded public key, checks if current PCR values match any in the signed list, and only unseals if both checks pass.
This is implemented in systemd-cryptenroll like this:
# Seal with signing policy
systemd-cryptenroll /dev/nvme0n1p2 \
    --tpm2-device=auto \
    --tpm2-public-key-pcrs=0+4+7+9 \
    --tpm2-public-key=/etc/tpm2-policy.pub \
    --tpm2-signature=/etc/policy.sig
The Security Model
The beauty of this approach is that the TPM itself performs the verification:
The TPM hardware ensures that only policies signed by your key are accepted, signature verification happens inside the TPM, and no software can bypass these checks.
Operational Benefits
Signed policies enable pre-authorised software updates (calculate new PCR values before rollout), emergency recovery (include recovery configurations), time-bounded access (policies can expire), and centralized control (update policies without touching every machine).
Software Updates
Here's where theory meets practice. For software components, we can predict PCR values using systemd-measure:
# Measure a new kernel before deployment
systemd-measure calculate \
    --linux=/boot/vmlinuz-new \
    --initrd=/boot/initrd-new \
    --bank=sha256

# Output:
# 11:sha256=2718affc667b84dd16e6730d6d96c59751a5c08e05f44e50e9710c3703a2bb51
Integrating with Bottlerocket's Build System
To make signed policies truly useful for Bottlerocket, we'd need to integrate measurement and policy generation into their Twoliter build system after all the other artefacts have been made and use systemd-measure to measure them.
The policy would travel with the OS image itself, embedded in the boot partition alongside the kernel. This would enable pre-calculating PCR 4 (bootloader), 8 (kernel cmdline), and 9 (kernel) values during the build process, allowing truly automatic software updates without separate policy distribution. The dm-verity root hash is in the kernel cmdline, which would enable unusually strong sealing properties of PCR 8, in that the entire root partition's integrity would be guaranteed if we bind to it.
For more on TPM 2.0 policies, see the comprehensive TPM 2.0 Policy Tutorial by Google.
Real-World Considerations
Our implementation protects against the scenarios we care about most:
- Disk removal and attempted mounting elsewhere
- Hardware decommissioning and disk disposal
- Disk replacement procedures
However, we're aware of its limitations. An attacker with physical access could potentially:
- Install a different OS as Secure Boot is currently not enabled
- Roll back to older, vulnerable software versions
- Modify firmware or Secure Boot configuration
These aren't just theoretical concerns - they're techniques used by sophisticated attackers against high value targets. But security is about managing risk, not eliminating it entirely. Our current implementation provides good protection against opportunistic attacks and the unbounded risk of hardware recycling while remaining operationally manageable at our current scale.
Lessons Learned
Simplicity has value (PCR 0-only binding solves immediate needs whilst laying groundwork for future enhancements), perfect is the enemy of good (we have working disk encryption today rather than waiting for the ideal solution), operations matter as much as security (secure systems nobody can operate just create expensive downtime), and hardware security enables new possibilities (automatic operation without sacrificing security).
For those interested in diving deeper into TPM, I recommend:
- A Practical Guide to TPM 2.0 - comprehensive TPM 2.0 reference
- Discoverable Partitions Specification - modern Linux partition standards
- Microsoft's TPM Overview - excellent conceptual introduction
Conclusion
By contributing TPM support to Bottlerocket and implementing hardware-bound disk encryption, we've achieved important security and reliability milestones already: servers that boot without human intervention whilst ensuring customer data can't be accessed in recycling scenarios.
But of course we aren't done yet, once we enable Secure Boot across our fleet, we'll migrate from PCR 0 to PCR 7 binding for protection against OS reinstall attacks also. Future enhancements might include signed policies with build-time measurements and remote attestation for exceptional cases - to make it even harder for APTs to gain covert access - but for now, we there isn't enough value in our platform for APTs to justify the effort of gaining physical access to execute the attacks needed (in contrast to AWS and Google).
TPM sealing provides the cryptographic glue between Bottlerocket's software integrity (from Part 1) and the hardware it runs on. The best security solutions are never the most complex ones - they're the ones that solve current and real problems whilst remaining operationally viable. Our TPM implementation was strongly guided by this: sophisticated enough to protect what matters given our risks right now and simple enough to actually work.
This is part 2 of a 4-part series on Bottlerocket's security architecture. Next: Part 3: Runtime Security - Detection and Prevention in Production (coming soon)